Materials
Construction paper, decorative paper, two pieces of cardboard, scissors, glue, and ribbon.
Optional: Bone folder and cutting mat.

Step 1:
Create the center crease
Fold your construction paper in half, hamburger style. Unfold the paper, then fold it in the opposite direction to make the crease flexible.



Result
Step 2:
Fold the edges inward
Fold the top and bottom sides of the paper to meet the center crease. Unfold and reverse each fold to make the crease flexible.
Step 3:
Create the vertical creases
Turn the paper and fold it in half, hot dog style. Fold each side toward the crease, then reverse each fold.
Result

Step 4:
Mark the cutting path
While using the creases as your guide, draw or make dots through the grid: Three rectangles across, two down, two across, one up, and one across.
Step 5:
Cut along the path
Carefully cut along the line or tick marks you created. Stop cutting when you reach the end of your path.
Step 6:
Fold the pages
Beginning at one end, fold the paper back and forth in an accordion pattern until you reach the end.
Result
Step 7:
Prepare the covers
Glue the two cardboard pieces onto the back of the decorative paper. Leave about ½ inch of paper around each piece, with a small space between them.
Step 8:
Separate the covers
Cut the decorative paper between the two cardboard pieces, as well as any excess paper beneath them, leaving a small border around the cardboard.
Step 9:
Fold the corners
Fold each corner of the decorative paper diagonally toward the center of your cardboard. Repeat on your second cardboard piece.
Step 10:
Fold the edges
Fold the top, bottom, and side edges towards the center of the cardboard. Repeat on your second cardboard piece.
Step 11:
Apply glue
Carefully unfold the corners and apply glue to the decorative paper and the outer edges of the cardboard.
Step 12:
Secure the corners
Fold the glued corner pieces diagonally toward the center of the cardboard. Use your bone folder to secure the corner folds.
Step 13:
Secure the edges
Fold the glued edges over the corners and towards the center of the cardboard.
Step 14:
Secure the ribbon
Apply a line of glue across the center of the back of one cardboard cover. Center the ribbon across one cover and attach it. Do not attach the ribbon to the other piece of cardboard.
Step 15:
Find the first page
Find the first page of your accordion-folded paper.
Step 16:
Attach the front cover
Apply glue to the inside of one cardboard cover. Align the first page with the cover and press it carefully into place.
Result

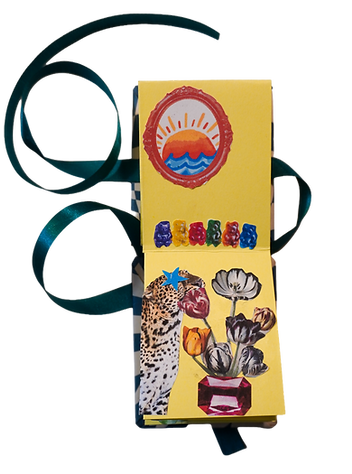
Final Product

Learn how to make a
crazy book